The importance of grip and slip

When I was first learning to spin I couldn’t understand where grooves and whorls on the wheel needed to be smooth and where they needed to have a good grip. I assumed (wrongly) that all places where there were drive bands and brake bands should be unpolished. Worse, when I was cleaning my wheels I didn’t take enough care about keeping polish from these places.

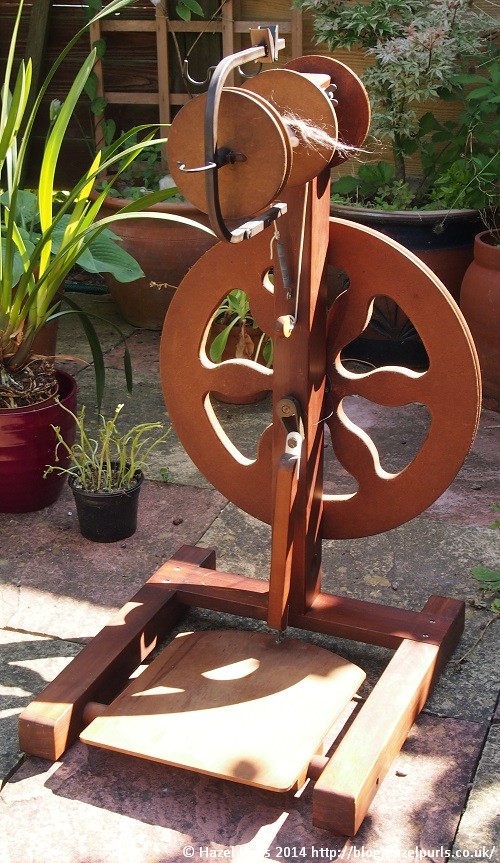
During the TdF I was using one of my Ashford traditional wheels with the sliding hook flyer. This was the second wheel I bought, and the flyer was the first wheel upgrade I purchased (at the height of my ignorance on whorls and grooves).

When plying the two skeins during the tour I struggled a little with the wheel during the last few yards, but not enough to worry about it. However, when I plied the most recent skein the wheel was almost impossible to use. I couldn’t get a good balance between twist (from the drive band) and pull-on (from the brake band). I changed the drive band about 4 times (trying different materials: cotton string, cotton weaving yarn and pony band lacing) and I also changed the brake band. I applied copious amounts of spinning oil. However, the wheel was still extremely difficult to use and was making the most appalling screeching noise – it sounded like a drill. In the end I carried on regardless (extremely glad there was no-one in the house except me that night to hear the noise).

Sadly the fight with the wheel shows in the resulting skein – which is unevenly and generally under plied (with some sections being particularly poor). I will have to run the yarn back through the wheel to correct this.

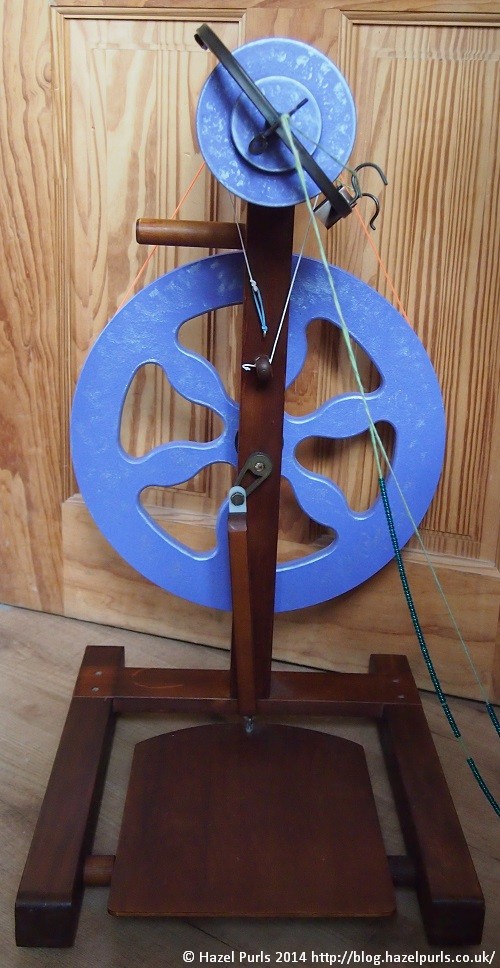
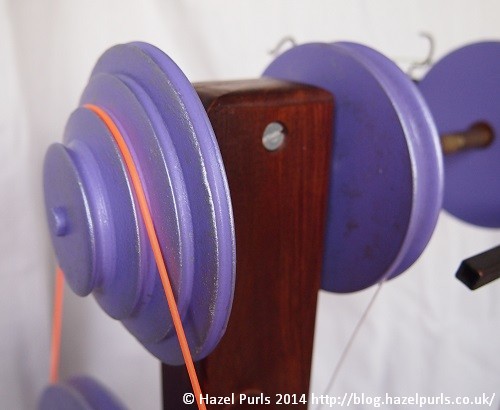
A couple of days ago I started correcting the problems with the wheel. The wheel uses scotch tension so the brake band runs over a groove in the bobbin. It’s fairly common to use a nylon line (like fishing line), though I’m not fond of this, and having got used to using a mercerised cotton thread (like thin crochet thread) I prefer this. Because this is the brake band the first thought is that the groove should have a good grip. In fact the groove should be fairly polished and run smoothly under the brake band. Any roughness may cause the band to catch and the bobbin to run jerkily, or make it difficult to apply a little more pressure to slow the bobbin down, without it gripping completely and stopping it in its tracks. So I’ve carefully sanded (with a fine sandpaper) the grooves at the end of the troublesome bobbin, and applied a wax polish (ideally I should use an oil finish, and may do so in the future) repeating until they were smooth. I shall do the same with the other bobbins in due course.

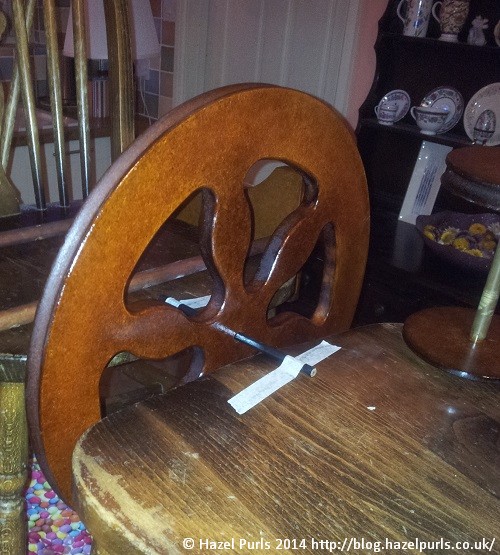
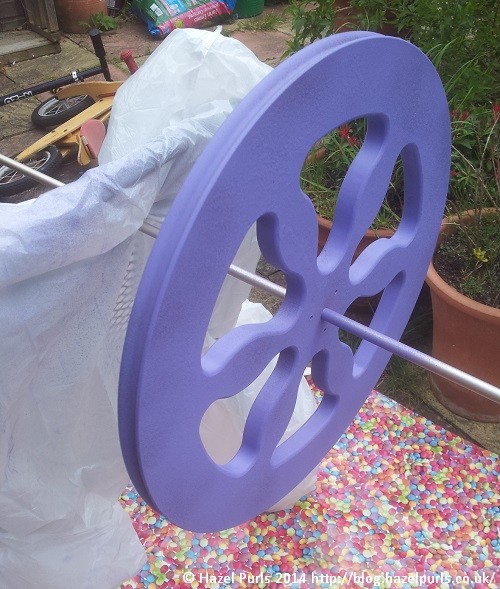
The groove in the drive wheel was feeling very smooth so I’ve gone around this with a coarse sandpaper to increase the grip. I’ve done the same with the whorls on the flyer. The smallest gives a ratio of close to 20:1 which means there is very little surface area available so a good grip is essential. I’ve seen rosin (as used on bows of violins and other string instruments) suggested to improve the grip of drive bands on wheels, so I shall investigate this if I have any further problems.

I’m happy that I’ve fixed the problem, but the proof of the pudding is in the eating (a picture of the skein will follow when I’ve properly tested the wheel and corrected the plying problems).

Should you be reading this as someone who is learning to spin and trying to get their wheel functioning properly – here’s the short version (for a scotch tension wheel): The groove(s) on the bobbin should be smooth (sanded and polished). The groove in the drive wheel and the grooves for the whorls on the flyer should be grippy (no polish).

A tale of a wheel’s transformation

Long, long ago (last year); in a land far, far away (ok, about 10 miles away from here); I bought a spinning wheel.

original

It was a lovely wheel and I enjoyed using it to spin wild, unusual and time travelling yarns.

However, after a while I noticed a problem. The flyer was showing wear on the largest whorl and I started to worry that I would be damaging the wheel if I continued using it.  The wheel also had a wobble, which I hoped could be fixed.

wear

I took the wheel to bits (as far as it would allow) so I could refinish the drive-wheel and flyer surfaces (which are an MDF type of board – hard and dense made from glued together wood fibres) and give the spinning wheel a general overhaul and service.

TOOLS: I used a thingamabob (correct technical name, but just so we are talking about the same thingamabob, I’ve taken a photo).  I also used an hexagonal Allen key (imperial 3/32”), screwdrivers and an adjustable spanner.

thingamabob

To remove the drive-wheel, I took the crank off the drive-wheel’s hub shaft using the 3/32″ Allen key to undo the grub screws.  When reassembling there are two flattened surfaces on the shaft that the grub screws hold onto.

crank

In order to remove the flyer I used the thingamabob to grip gently onto the sealed bearing that runs through the wooden upright.  This gave me enough leverage to rotate the bearing in the wooden upright and wriggle it out (just pushing the flyer didn’t work as it is an extremely tight fit, the rotation allowed the flyer to be wriggled free).  When reassembling I again used the thingamabob, but also applied silicon lubricant in an effort to make it slightly easier, it was still a tight fit.

Once in pieces I gave the wooden parts of the wheel a good polish and made the base level (there is a slight warp in the wood for the bottom H of the frame, this was levelled by adding washers between two of the feet and the frame).

I then turned my attention to the MDF parts.  I decided to use the lazy kate to test any products I was intending to use on the wheel.  Though a good idea in principle, in practice it turned out that there had been more wear on the surfaces of the wheel than on those of the lazy kate.  So, if you have a Pipy Poly and wish to refinish the wheel, please check anything you use on a part of the wheel that isn’t going to matter if it reacts badly to the product.  In my case I discovered that using an acrylic based MDF sealer was a very bad idea – the surface of the drive wheel bubbled even though the lazy kate had been fine!!!!   Fortunately I didn’t damage anything that affects the performance of the wheel and the subsequent finishes hide the cosmetic damage.

Having discovered that MDF sealer was not suitable to use on my wheel, I looked for more information and discovered in a Jocasta Innes book that shellac could be used to seal old MDF furniture prior to painting.  I bought some “Button polish” (which is a solution of shellac in alcohol used in French polishing).  I put 2 or 3 coats of this on the MDF parts of the wheel (starting with the drive wheel and then working on the flyer and bobbin).

wheel-shellac

Next up was the painting!!!!

I used an acrylic spray paint to finish all the MDF surfaces (this was a fun task to do on the patio one day) I gave all parts 2 or 3 coats.  I finished with some silver paint and then a couple of coats of clear acrylic varnish.

wheel-paint

Sadly I was unable to fix the wobble, as the drive-wheel’s hub shaft has a small bend.  However, by carefully aligning the flyer whorls with the wheel, problems this was causing have been eliminated.  I’ve used pony bead lacing (used by children for making necklaces and bracelets) as the drive band material.  It’s softer than the poly drive bands but grips surprisingly well.  It is also extremely easy to cut and join, and comes in some great colours.  To reduce excessive wear on the flyer from using a tight drive-band I have three separate drive bands to use over the four whorls.

I put the wheel back together, just in time for us to attend a spinning course at the start of May!

wheel

flyer

I’ve been kindly given a copy of the instructions that go with this wheel by a friend.  Click on the image for a full-size copy:

instructions-thumb

Fettling

I’ve spent a bit of time this week fettling1 with my two Ashford Traditional wheels.  It started with the thought that perhaps I don’t need the jumbo flyer now that I’ve got the Pipy Poly wheel (though I currently only have one bobbin for it).  Anyway, there have been so many changes I thought I’d create a table:


Changing Wheel Configurations

 
  1960’s Wheel Late 1980’s Wheel
Start of week Jumbo flyer and modern MoA2. Lace flyer and maidens with sealed bearings.
First change Restore original MoA but use sliding hook flyer.  
Today Remove original (60’s) maidens and install lace flyer maidens and lace flyer. Remove lace flyer and restore original (80’s) maidens and use sliding hook flyer.

The oldest wheel has been rather heavy to treadle with the jumbo flyer.  Sometimes it worked well, but the wheel has never felt entirely happy with this arrangement.  The original maidens have leather bearings.  They are very sturdy and work well.  The sliding hook flyer (and all modern flyers) has a slightly longer spindle than the original flyer.  It fits between the maidens very well and works, but the maidens need to be turned a long way to change bobbins.

60-4speed-side

The big problem is that the front of the flyer is flat and gives a large area of contact with the bearing (the original flyer has a curved front which has very little contact with the bearing).  This obviously slows the flyer down making the wheel harder to treadle and also causes some noise.  However, I’ve done quite a bit of plying this week with this set up.

60-4speed

1960’s wheel with the lace flyer:

old-lace

The wheel practically purrs in this arrangement!  It’s lovely to treadle.  Even the smallest whorl (which gives a lightening fast 40:1 flyer:wheel ratio) is easy to treadle.  However, the rubber band which provides the spring in the brake band is on the wrong side according to current recommendations, though Anne Field was of the opinion that the arrangement I currently have is the correct one!  Certainly it appears to work well, so I’ll leave it for the moment and see how it does when filling up a bobbin.

old-lace-close

The traditional way to thread a single through a small orifice is with a feather.  I’m not a fan of feathers, but a pipe-cleaner works well:

pipecleaner

The next thing to do with this wheel is to make a nice knob for the brake-band instead of just having a piece of dowel.

And for completeness, the 1980’s wheel restored to original parts with the sliding hook flyer:

new-today

I promise that my next post will have yarn.  Actual finished YARN!!!  Now I must get on and do some spinning!

1- British dialect meaning to modify or change something to get it working correctly.  These are often small incremental changes until things are right.  When I’m working on my wheels I feel a bit like someone who owns motorbikes and spends the evenings taking the engine to bits, tuning it up a bit and putting it back together. 

2-Mother-of-All: the bit of the spinning wheel that supports the maidens and flyer.  I think that one day I should make a diagram and write a glossary!

A Great Wheel and Coreless Core Spinning

Though not coreless core spinning on a Great Wheel!

Some of the mohair I mentioned in my last post was carded into two batts with some natural white Shetland.

mohair-batts

I then corespun this without a core (the core is made while spinning, just moments before it is wrapped in fibre):

coreless

This has become my entry into the Ashford UK Spinners (AUKS) “First Challenge” on Ravelry.  It’s been a year since AUKS was born and we now have well over 300 members.  To celebrate our first year in existence Elaine (one of the group’s moderators) has worked very hard to organise a spin-along with some fantastic prizes.  The challenge was to have a first go at spinning something, be it a new technique, a new tool or a new fibre.  This was the first time I’ve spun with mohair and my first ball of coreless core spinning.  It’s been lovely seeing what other members have chosen to spin, and this week pictures of the final skeins have started to be posted.

I still had most of the mohair left, so while at Creating Space a few days ago, I handcarded that into clouds too.  I added some glitter and started drum carding again.

clouds

Which I finished off with a late night carding session.

stack

All ready for my next coreless experiment!

While at Creating Space I had the wonderful opportunity to try spinning on a Great Wheel.  She’s called Catherine (after St Catherine the patron saint of spinners) and belongs to the Guild of Longdraw Spinners.

wheel

I’m concentrating very hard (thank you Norma for the opportunity and the photo):

concentrating

I’m now wondering if I should get a quill for one of my wheels!

Saddle Sore

I’m not really saddle sore – I don’t think I actually did any cycling while participating in the Tour de Fleece at all.  But the tour has ended and now it’s time to look back and review the experience.  Before the tour started I set out some aims:

Spin everyday!

I did this!  I managed to do some spinning (or spinning preparation) everyday that there was a cycling stage in the Tour de France, and I even spun a little on one of the rest days!  Sometimes it was just a few minutes before bed, but sometimes I did a few hours.

Do some spinning on all of my wheels!

I also managed this.  I started the tour with six wheels and acquired a new one somewhere in the middle – which did complicate things a little.  I’ve spun a lot on some wheels (my oldest Ashford with both jumbo and standard sliding hook flyer has seen a lot of use) and just a little on others (both Haldanes have only been used a little, which is a shame as I like both wheels).  Here’s what’s on, or been on, my wheels during the tour.

Completing the singles of the Soybean and Sheltand on my Traditional with lace flyer:

ashford-lace

And starting to ply on my oldest Traditional:

soy

Juno dyed Falkland fibre on my Dryad:

dryad

BFL dyed with food colour on my Queen Bee:

spinolution

Continuing to spin some unspun yarn on my Hebridean:

hebridean

Making singles for the middle of the bowties on my Lewis:

bowtie-parts

Learning to core-spin on my oldest Traditional with jumbo flyer and on my Pipy Poly:

core

Spin a fun Doctor Who inspired art yarn.

When I put this as an aim I wasn’t quite sure what I was going to do.  Part way through the tour I started playing with core-spun yarns.  Then I started to think that the structure of the core-spun (with the fibres wrapping around rather than running along the length of the yarn) was a bit like the Time Vortex, add in some bowties…

I decided to make bowties with felt, and wrap singles around the middle to turn the rectangles of felt into bows.  I wanted two colours of bowtie, blue and aubergine.  Sadly, the first blue felt piece I made didn’t work for two reasons.  The Angelina didn’t bond into the wool properly and then when I rolled it, the colour of the Angelina wore off and I was left with bronze and silver sparkle instead of just the bronze.  I successfully redid the blue with smaller amounts of pink sparkle (which is the same colour I used in the aubergine felt and looks much better anyway).

I had a very late night on Saturday cutting up felt and then making up bowties.

paper

rectangles

On Sunday morning I prepared some core yarn by spinning it anti-clockwise to reduce the amount of unbalancing twist there would be in the finished yarn. I then packed everything up and took it to an open farm day, where I spun on the Poly wheel, which I’ve only used once before, using a technique I am still learning and adding the bows to the yarn in a way I’ve never attempted before. I even had to make up more bows using fairly active singles as I’d only had time to make aubergine bows the night before.

batt

I spun some more when I got home and ended up with 80 yarns on the biggest bobbin of yarn I’ve ever spun:

full

Wound into a skein, washed and tied with yellow ribbons:

bowties-close

I still have about two-thirds of the batts left over so I hope to make another skein with the same number of bowties and a final skein with just a few bowties.

Finish off any languishing projects.

I have not finished any projects that I did not start during the tour, though I have made progress on some.  I’m particularly pleased to be finally plying the Soybean and Shetland!

Overall I’ve really enjoyed the experience of participating in the Tour de Fleece.  I’ve loved the focus on the spinning, the chance it’s given me to explore new techniques and the opportunity to share with other spinners in the UK and abroad.  I will definitely do this again!

Atchoo!

Last time we spoke I was going to start refurbishing my newer Ashford Traditional wheel.  On Sunday I took her to pieces:

pieces

I covered the leather strip (that connects the treadle to the footman) in a thick layer of beeswax furniture polish and popped it into a plastic bag to soak it in and hopefully recondition the leather. Spares are easily obtainable, but I’d like to use the one that’s on for as long as possible.  Other small pieces I’ve popped away for safe keeping (I hope I can remember where later).

This evening I created a lot of dust:

dust

And made the wood look much better:

front

I aim to get the wood clean, but not to be too perfectionist, good enough is fine.  I plan to put the wheel back together in order to oil it.  I had thought about doing it while it’s in pieces, but that makes it hard to manage parts that need finishing on all sides.  I’ll use the original bolts (that don’t tighten too well) while I’m oiling it and when it’s all dry I’ll replace them with the new ones.

I’m glad I took the wheel to pieces.  Even though it was put together pretty well, I discovered that a couple of screws had been swapped over.  This hadn’t caused any problems, but it’ll be nice to get it back together correctly and with the new lace flyer installed!

And about time!

So, young lady, what are we going to do with you then?

wheel

Yes I know I bought you, oiled your moving parts, gave you a new flyer and drive band, and replaced your bolts so that you weren’t wobbly any more.  But I haven’t cleaned up or polished your wood at all!!!  Yes, I know my children like to use your drive wheel as a ship’s wheel.  I would be feeling a little neglected too!

I’ve got a nice new lace flyer for you, see:

lace

The wood’s not finished yet.  Would you like a new finish to match?  You would?  I was wondering about some decoration?  Perhaps painted flowers?  You’re not sure?  I’m not sure either.  Shall we stick with a couple of coats of the oil I use on the kitchen worktops?  OK then.

hub

Yes I’m a bit worried about the screw/bolt/pin thingy through your hub too.    Shall we just see if we can work around it?  Hmmm, I’ve also spotted that yarn wrapped around your wheel axel.  You’ll have to stop joining in the children’s games and pretending to be a pirate ship!  They haven’t realised you’re a pirate ship?  Well I won’t tell them, we’ll let them work it out for themselves.

Spindle spun Blue-Faced Leicester

Firstly a quick update.  In my last post I mentioned that my phone was languishing in a bag of rice.  I don’t know if it made a difference, but my phone survived. Hurray!  Here’s the stash:

stash

Now, onto the Blue-faced-Leicester.  I dyed the tops at the start of this year.  You can see me starting to spin it in January.  So, after months and months of spindle spinning (not constant spinning, only occasional spinning) I’ve plied together two spindles worth and have a lovely skein of yarn.

The singles:

singles

I made a box lazy-kate.  It’s “designed” to take the spindle or knitting needles (I slid the first spun cob onto a knitting needle).  The spindle occasionally fell out as the cob was unwound, but the knitting needle worked brilliantly.  I’m keeping my free lazy-kate for future plying projects.

kate

I plied over a couple of evenings on my Dryad wheel.  The second cob had a lot more yarn (by length, not necessarily by weight) so I finished off by Andean plying (I didn’t get into too much of a tangle and at one point discovered that the bed-knob at the bottom of the bed was a great holder for the resulting bracelets of yarn).

wheel

Sadly, it’s November.  It gets vaguely lighter at about 8am and is dark again by about 4pm.  The last few days have been ones where the lights have stayed on all day in the house.  Even at noon.  So in the end I bowed to the inevitable, and photographed the final skein in the warm glow of artificial light:

skein

I may be a little quiet for a week or two – as paid work will take priority. If I do post tell me to stop procrastinating and get on with my proper job Smile.  I’ll be back soon…

A new wheel

Today my new wheel arrived and was promptly whisked out to a craft group meet-up.  I took her to bits, gave her a polish, put her back together again and put on a new drive band. 

20121110_135456

I then wondered what to spin on her.

I fished out of my stash some white, grey and “black” Shetland tops took a length of each and thought about a marled yarn.  Then Secret Spinner walked past and said that she was planning a gradient yarn with her Shetland.  What could I do?  I decided on a quick spin of a small amount of gradient yarn.

I put the tops into groups working from white to black.  For the transitions between white and grey, then grey and black I held the two adjacent tops together and drafted them together.  This produced a marled rather than carefully blended single.  If I was going to do this on a larger project I would go to the effort of blending the transition colours together before spinning.

20121110_135709

This evening, once I’d got the wheel set up at home, I checked the assembly instructions (they can be found on Ravelry).  I discovered that there are two bobbins for spinning singles and one bobbin for plying!  I checked my bobbins and found that two have a whorl that is slightly larger than the remaining bobbin’s whorl, so assumed that the odd-one-out is the plying bobbin.

I’m planning on Navaho plying my blue BFL.  But I don’t want to learn on that project.  So this gradient spun Shetland was the ideal candidate for practicing on.  I got in a tangle a few times (I think leaving the singles to set for a day or two would make things much easier).  However, I ended up with a beautifully balanced skein:

skein

It’s now soaking to set the twist.  What shall I knit?  A winter hat, a beret, a small scarf or a Mobius cowl?  It’s not a huge skein, but I should be able to get something useful from it.

As for my new wheel?  She is a delight to spin on.  I’m about to upgrade the flyer on my Traditional to a lace flyer, so the Haldane Lewis will fill that gap and provide me with a lovely wheel for spinning 4-ply to DK thickness yarn.