Making the most…

I live on the outskirts of a beautiful city, but I find that sadly I don’t make enough use of all that it has to offer.  So yesterday my friend and I decided to correct this and see the “Death on the Nile” exhibition.  It was fascinating, and amazing how well some of the painting on the coffins has survived over millennia!  We did, however, find ourselves becoming more and more curious over the pigments used for the painting!  We learned that many of the pigments were earth based.  And the blue on the newest coffins (those around 2 thousand years old) was indigo.  A different blue was used on the older coffins.  The museum has just posted an explanation of the pigments used including a video showing how Egyptian Blue was made.

Sadly we weren’t allowed to take photos in the exhibition.  However, there was no such restriction for the recently arrived Henry More sculpture:

henry

This is “Hill Arches” and is on loan at the Fitzwilliam museum in Cambridge until November 2017.

I thought the patina would be a good colourway for some dyeing:

patina

I parted company with my friend and headed back to the car.  On route I met these guys:

cows

They decided to follow me:

followed

Oh my, they have horns:

still-followed

Fortunately they were really only interested in finding some tastier grass!

After I’d picked the children up from school we came back into town for a picnic in the botanic gardens. The ducks got bored of asking for sandwiches, so sat down to wait until we were finished:

ducks

foutain

tulip

I can never resist pinks and purples!

Round and round…

On Friday I found myself designing and printing a short leaflet to advertise the up-coming Open Studios event I’m taking part in, ready to distribute at the village plant sale on Saturday.

os

It’s just 6 weeks and 2 days away!  Earlier this week I made a list of all the things that need doing.  I’m going to be very busy!

On Saturday I borrowed my daughter’s hoola-hoop for a little weaving.  I knew I had to finished the weaving before my daughter missed her hoop.  So, I got straight to work, warping up the hoop with cotton yarn, and weaving in ever- increasing circles.

beginning

growing

woven

knots

I succeeded in my goal, and my daughter hasn’t noticed a thing.  (She hasn’t even noticed that the hoop is somewhat cleaner than it was before the weekend!)

I then progressed another project, blending (a variety of wools, seacell, trilobal nylon and bamboo) and spinning with Teeswater locks:

batts

locks

spinning

bobbin

I think I can squeeze a few more locks onto there before I start spinning the plying thread!

#WIDN #KeepInstagramChronological #ChangeItBack

A few days ago Instagram started shuffling the order of posts I see on my account. This is not a change associated with the latest app update (though it started happening at the same time Instagram released the updated app) because it was happening for a few days before the app was updated on my phone and the feed is also jumbled when accessing via the web interface.

I have found that I miss the synchronicity of posts. I enjoy seeing sunsets sweeping across the country. And waking up to sunrises. I enjoy seeing a beautiful sunset and at the same time seeing a friend from across the world posting an equally beautiful sunrise. I enjoy seeing projects develop (sometimes seeing them backwards as I work back through the posts). I love seeing when people are heading to the same event, at the same time, from different parts of the country (or world). And I love seeing their posts appearing together while they are there. I enjoy posting up pictures of crafting, to see other friends posting up what they are doing at the same time. I love posting pictures from my garden and enjoying seeing friends posting about their garden at the same time. At least, I used to enjoy all this a week ago. I am missing the chronological nature of the posts.  Progress on projects is shown without any order and I do not enjoy hunting around for posts I am expecting to see at the time I log on.

I’m finding I no-longer wish to post onto Instagram. So, for the moment I am going to take a holiday from Instagram and instead concentrate on making longer posts on my blog.

Nature

The last seven days I’ve been taking part in a Facebook challenge to post a photo a day for 7 days, with “no people or buildings – just nature in all its glory”.

I’ve enjoyed doing this and thought I’d share my week in photos.  (Most pictures were taken on the day, but the occasional one was from the previous day or a few days before).

5th May – A field of cowslips:

cowslips

6th May – Blossom in the orchard (taken day before):

apple

7th May – Auricula (taken a few days before, and featured in my last blog post):

auricula

8th May – Forget-me-not.  At first glance I thought this was a carpet of bluebells.  It reminded me of the flower fairy poems by Cicely Mary Barker:

So small, so blue, in grassy places
My flowers raise
Their tiny faces.

By streams my bigger sisters grow,
And smile in gardens,
In a row.

I’ve never seen a garden plot;
But though I’m small,
Forget me not!

forget me not

9th May – Bluebells (taken day before):

bluebells

10th May – Raining all day – so a spot of nature from inside:

orchid

11th May – After the rain, raindrops on aquilegia leaves:

drops

I’ve enjoyed sharing my photos during this week, and think I’ll be continuing on with the challenge.  May is exuberant and it’s proving to be a lovely month to share.

The Forget-me-not Fairy, “Flower Fairies of the Summer” Published by Blackie and Son Ltd. (My copy doesn’t have a published date, but must be nearly as old as I am).

Well, hello!

It’s been a bright sunny day and, as usual, I’ve been filling it up to the brim.  I got home a short while ago, and the sun was still shining (albeit slowly setting), so I grabbed my chance to photograph the latest spinning on my wheel.  (My last attempt at taking a photo outside a few days ago resulting in my wheel being snowed on!)

sari

It’s spun Sari ribbon.  It’s linen, instead of the more usual silk, which as you may know I avoid because I’m a vegetarian.

I spun the ribbon around a core of wool – creating the core as I went (so basically I used coreless core spinning for this – with the wrapping “fibre” being the ribbon).  I then plied it to get a softer texture.  The last few feet didn’t fit on the bobbin, but I was still able to add the necessary twist to finish the yarn.  I really want to call it a braid as it’s so chunky.

The Sari ribbon was from my friend FibreTastic who was able to source me a couple of skeins of linen, rather than the silk.

While I was in the garden I spotted that one of my auriculas was in flower.  I finally potted these up this year, after many years of neglect, and I’m enjoying how they are looking this spring:

auricula

Monday

This morning I woke before my alarm went off, looking at the clock and reading that it was seven I realised the inevitable and decided I needed to get up. I tried to turn the alarm clock off and was a little surprised to find I’d not set it last night.

My thoughts then ran as follows: “What needs doing? Get the children to school… pack lunch boxes… have I washed them from Friday yet? No I haven’t. How have I managed to get through a weekend and not wash them? Gosh that weekend was short! What did we do Sunday? Sunday? I don’t remember Sunday. I think today’s Sunday…”

At this point I checked my phone, and it agreed, blurrily, that it was Sunday.

I think my morning confusion may have been the lingering result of over-tiredness following a trip to Ikea and subsequent furniture building.

For a very long time my 4-shaft loom has been stored away because there hasn’t been anywhere suitable to use it. Eventually I realised that there was a space in the lounge behind the sofa, but I then couldn’t find a table the right size. I looked at the treadle kit and stand for it. But not only do I not want to use the treadles (it would still be a table loom, as there is only a one-to-one correspondence between the treadles and the shafts) but it is also incredibly expensive. I couldn’t find a table that was the right size either. The loom is around 74cm deep and nearly a metre wide, and getting a table to accommodate it, that wasn’t too big, was proving tricky. I had been considering making a table top and getting trestle legs from Ikea to make a table, but the space between the legs would be inadequate, and so my loom continued to sit, unused.

Then as I planned a trip to Ikea (the aim of which was to buy something to store my son’s lego, now organised into colours) I spotted a new table. 74cm deep and 125cm wide. A little wider than ideal1, and I’ll admit a little more than I’d really wanted to pay, but it had been a long time, and a table loom isn’t a cheap tool to have sitting unused. So on Friday evening a table was bought in Ikea (along with the inevitable random purchases that get you looking at the end bill in amazement) and I drove home, much, much, later than I had envisaged, with a full weekend of other commitments ahead of me.

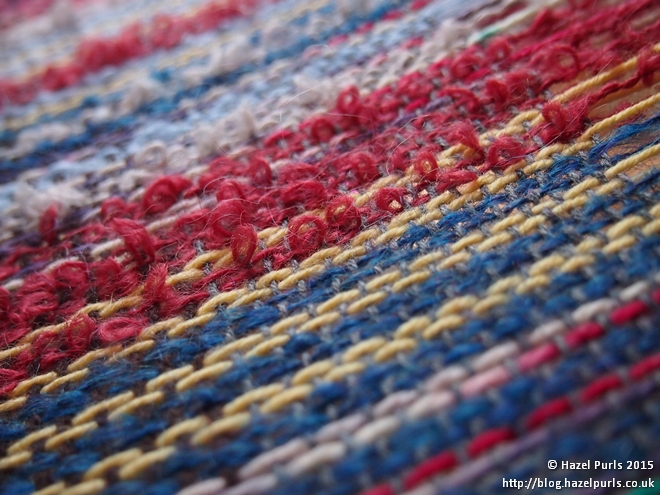
So it was on Wednesday when I finally got around to building the table. Then I got the loom on it, thought for a few moments and decided it was time for new challenges and whipped off the old weaving (rescuing a section of completed overshot) before dusting it down and starting to plan a new project. By the evening I’d found the free pattern drafting software I’d used before (it’s called Weave Design and is available from here) dived into my stash and found some promising 4 ply yarn, done some sums on the back of an old letter, retrieved the home made warping board from its hiding place, and wound a warp of 13′ 8” tied it up in all the right places (and a few extra ones just in case) and chained it up ready for the next stage.

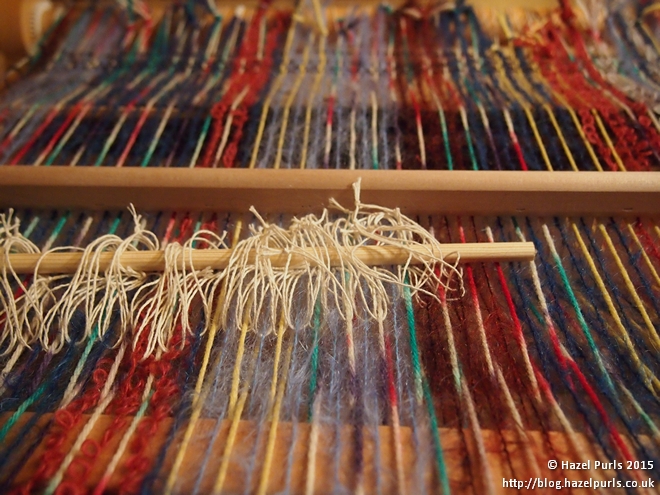
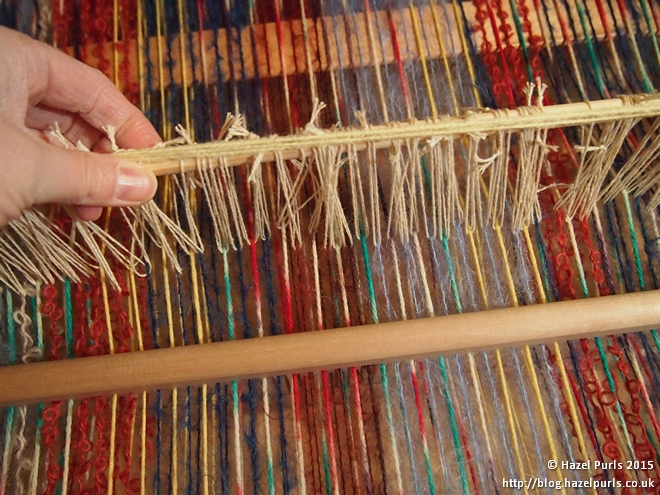
Thursday, was spent winding on the warp (including finding suitable paper, and then some more card when that ran out) and threading the heddles (I really believe there must be a quicker way to do this bit, it does seem to take a long time, even with under a hundred ends). Before I went to bed I tied string around the shaft pedals to stop the children playing with them (it turns out this wasn’t enough, as the children just lifted the shafts manually, without the pedals, but fortunately didn’t dislodge any of the knots holding the threads in place).

Friday I sleyed the reed (so quick compared to the heddles) and tied the warp onto the front beam, using the same method I recently used on my rigid heddle loom, wove a header, wove a little more to test the threading and then got underway…

hemstitching

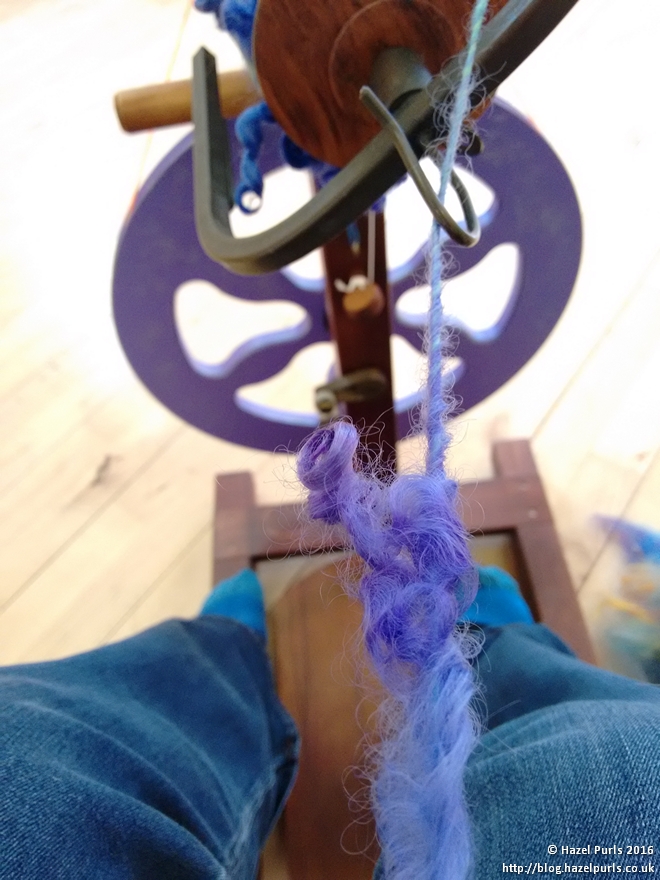
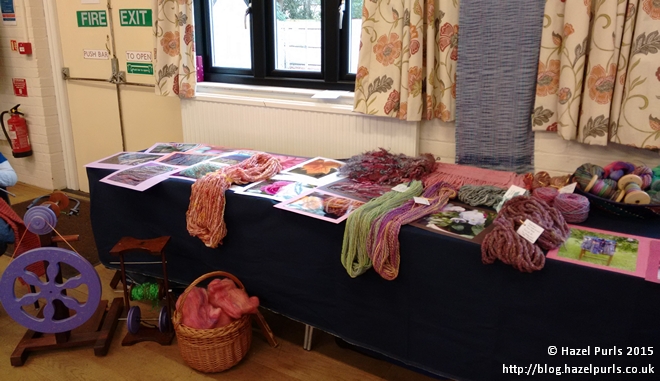
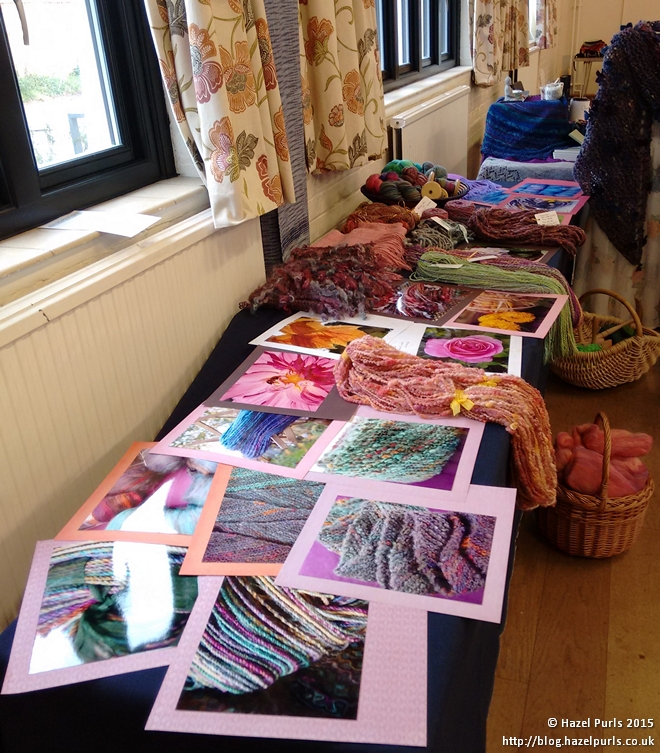
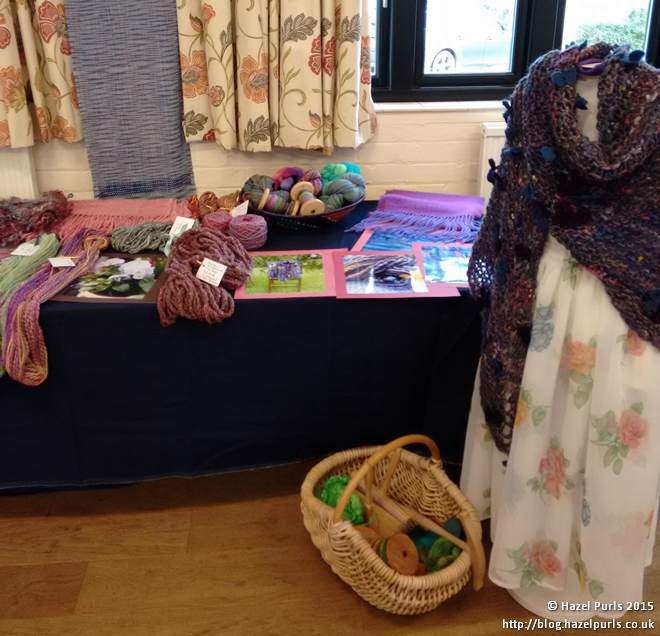
I’ve not had much time over the last couple of days to make more progress, but I’m really enjoying having my loom back in operation. I’d barely got into spinning before I bought the table loom, so my spinning has progressed a very long way (including into fancy textured art yarns) and I now need to work out how my yarns and my loom are going to play together.

1 – It turns out the table isn’t too wide.  There are 6 inches on each side of the loom.  Just the right amount of space to bolt an anglepoise lamp on one side, clamp my swift on the other (for somewhere to store it when not in use) and to keep useful tools (like scissors and tape measure) to hand.

90 Knots!

Over the last few days I’ve rescued a warp I made a mess of during winding onto the back beam (I was rushing and the paper wasn’t wide enough). The warp has lain abandoned for at least six months, with the heddle correctly threaded, but the threads not tied onto the front beam.   I unwound it and re-wound it with fresh paper between the layers. This sounds easy but proved hard, as there is a high proportion of mohair yarn in the warp and these stuck together with glee, happily hugging the wool yarns in their embrace too. So both patience and determination was needed to unwind and re-wind the warp.   I’m not sure how successful the rescue will be, as the threads were all different lengths then finally wound on. I’m expecting some puckering when the cloth is finished.

Once rewound I used a technique for tying to the front beam I’d seen in a video from Ashford. It involves tying small groups of warp threads together with knots then using cotton thread to lash the ends onto the apron. I found this to be really straightforward and I felt it was quicker to get the tension equal across the warp. I don’t mind the usual method, but do find I spend a lot of time going back and forth, tightening knots to get all the warp at the same tension. I shall be using the lashing method again.

Then I started weaving the header. Or should I say, I tried to, but didn’t get far! I’d lift the heddle up, and all the threads moved up. I moved the heddle down, and all the threads moved down. NO SHED! Perhaps I should have sized the threads before putting on the warp (I have no idea how to do that, or what to use, something to explore for another day)!

Before abandoning the warp and cutting it off the loom I thought I’d try using a pick-up stick to help separate the shed (I think I read about doing this on Ravelry). So I threaded a spare shuttle into the warp behind the heddle, and tried with that. This was better, but it only helped for one pick out of two. I didn’t fancy hand separating the warp for the alternate picks, so decided to try using string heddles to lift the threads that should be staying up. Fortunately I had some dowel that I cut to length, then I counted my warp threads and decided I needed 89 heddles, to be certain I made 90. I wrapped the string around a conveniently sized book and cut it to make the 90 short lengths, I then tied all these over a few sessions. I told my children I needed to tie 90 knots. “90 knots!” they both chorused in unison.

heddles

Once these were created I threaded them under the threads that are in the slots of the heddle (the threads that shouldn’t move) and looped the heddle onto the dowelling rod.

threading

Once I’d done the whole length and had tried it a few times, checking I’d not missed any threads or selected incorrect ones, I took a length of yarn and tied it at one end of the dowel, and then tied it at the other end of the dowel.

done

end

This is to hold the heddles onto the dowel, and to prevent the dowel from slipping out from the heddles. It looks like a handle, but I’m not using it as one.

checking

pickup

I wove a few more picks of the header and this morning have chosen a thread to use as the warp (I did have a thread planned, but as usual have changed my mind). The secondary heddle system is working. The pickup-stick is pushing down the free moving threads (it’s threaded over the threads in the slots) and the string heddles lift up the free-moving threads (so the strings loop under the threads in the slots). I’m still getting threads sticking together and I’m having to move my hand between the layers of the shed to open it up a bit more, but this is quick and easy compared to trying to weave without the secondary heddles.

weaving

Progress on Two Tours

While I was sorting out my stuff for the exhibition last month I realised I’d made progress on projects but not updated them here.  So last week I took some pictures while the sun was shining.

Since then I’ve spun some more, and even done some plying.

So today I took more pictures (the sun was shining again).

First up, the colour experiment from the Tour de France.  I’ve finished and plied three skeins with the different coloured singles, and I’ve spun (but not plied) the fourth skein (with matching singles).

colour

Secondly, the Tour of British Fleece rainbow is getting close to completion.  All the singles are finally spun and I’m half way through the plying.

Prepared locks, ready to be tail-spun.

locks

Here’s the basket with lots of full bobbins.

bobbins

Unbelievably, in my imagination, I had this full project fitting onto the single large bobbin of my Pipy Poly wheel.  In reality I just managed to squeeze from violet up to the green tail-spun locks onto the bobbin last night.  I think that the remaining singles will just fit onto one bobbin, making a rainbow split into two skeins (which I’m happy about).

Here’s the first full bobbin on my skein winder.  Half a rainbow!

halfrainbow

I’m looking forward to getting this finished.  I think I may spin a small amount of a soft fibre (probably BFL) in a pale blue, and use this above and below the rainbow when knitting it up.  I’m still thinking a capelet would be the best use for this.

And once this is finished?  My fingers are itching to do some art yarn…

Art of Craft

Creating Space‘s “Art of Craft” exhibition was yesterday and it went really well.  With two children in tow I ended up arriving with just 20 minutes available to set up my stand!

I’d found some blue denim in my stash (bought for making jeans a few years ago, but never used). It was an incredibly long length and I’m so glad I took it. Half way through setting up I realised I needed more table space, and was able to grab a couple of small tables to put at the end, the cloth happily covering them too. The denim had a second advantage, it showed off the yarns, shawls and photos really well, the dark colour complimenting them. I shall be using denim in the future, though I may cut the piece down into shorter more manageable lengths, or think about how to cover a table more effectively in the future (perhaps with a skirt to hide everything underneath) and then a separate cover for the top.

end shot

The photos I had printed were everything I hoped they would be. I’ve never had photos professionally printed from my digital pictures. I’ve had years of disappointments with developed photos from film, so I didn’t believe that the photos I saw on my screen could be replicated in a print. I was wrong, they could! I was lucky to find a firm in Cambridge1 who produce real photos from the digital images, and the results were stunning.

The photos I put onto 12″x12″ scrapbooking cards. I had intended to display them in an album but in the end I preferred them spread out on the table (they were the main reason I needed a longer table). For future shows I will have a selection of photos on open display and more will be in an album. I also wonder about making some of my flower photos available to buy as prints. I shall have to explore that option.

long shot

I didn’t in the end have enough time to put descriptions on all my photos (a task made slightly harder by some of the backgrounds being very dark and my needing either a silver gel pen or some white ink for a dip pen, neither of which I currently have). I shall now be aiming to keep my printed portfolio up to date for future shows, complete with descriptions, so that I can use it without having a rush just before a show.  I shall also endevour to have descriptions of some of the yarns, and the creative processes behind their creation.  For example, I was showing the three completed Tour de Fleece skeins, along with the original dyed fibre and some spun singles, with no explanation of the colour experiment I was working on.

Some of Friday evening was spent re-winding skeins of yarn and tying them up with ribbons. I was surprised how long this task actually took, and in the end didn’t display all my yarn, as I simply ran out of time. On the morning before the show I ironed my woven shawls so that they looked their best.  So one of my lessons for the future is that it takes much longer to get prepared for a show than it’s possible to imagine.

Harriette enjoyed her day out modelling the time travelling shawl (which just needed a couple of days recovering from being stored in a vacuum bag (moth proof storage) and no washing or ironing/steaming to get it looking its best). There were two highlights of the day for me.  Firstly, the great variety of makers we have in the group.  Quilting, dyeing, felting, printing, painting, drawing, spinning (from the finest lace to wonderful art yarns), knitting and weaving were all beautifully represented.  The second highlight was having the children with me, taking an interest in what I was doing and then also spending their day making crafts (knitting, weaving and modelling with play-doh and plasticine). They came home with an award from Lyn for being brilliant helpers and very well behaved.

harriette

I keep talking about “in the future”. Well, Creating Space are planning on doing another show, but more about that closer to the time!

  1. the firm used were Streamline Imaging and I’m happy to recommend them for good quality prints and excellent service.