A Tale of Two Courses

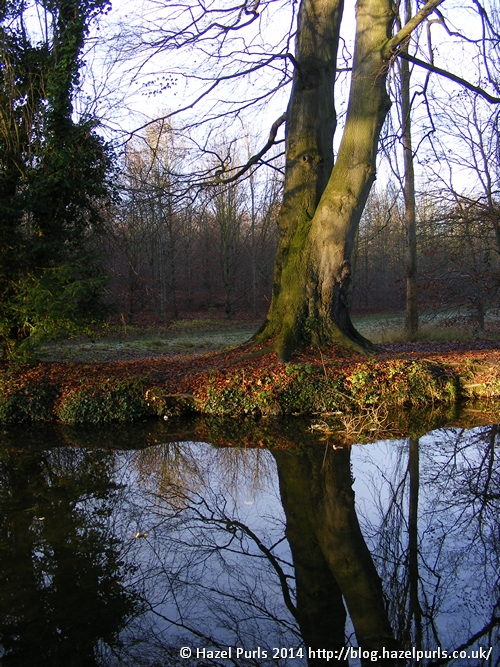
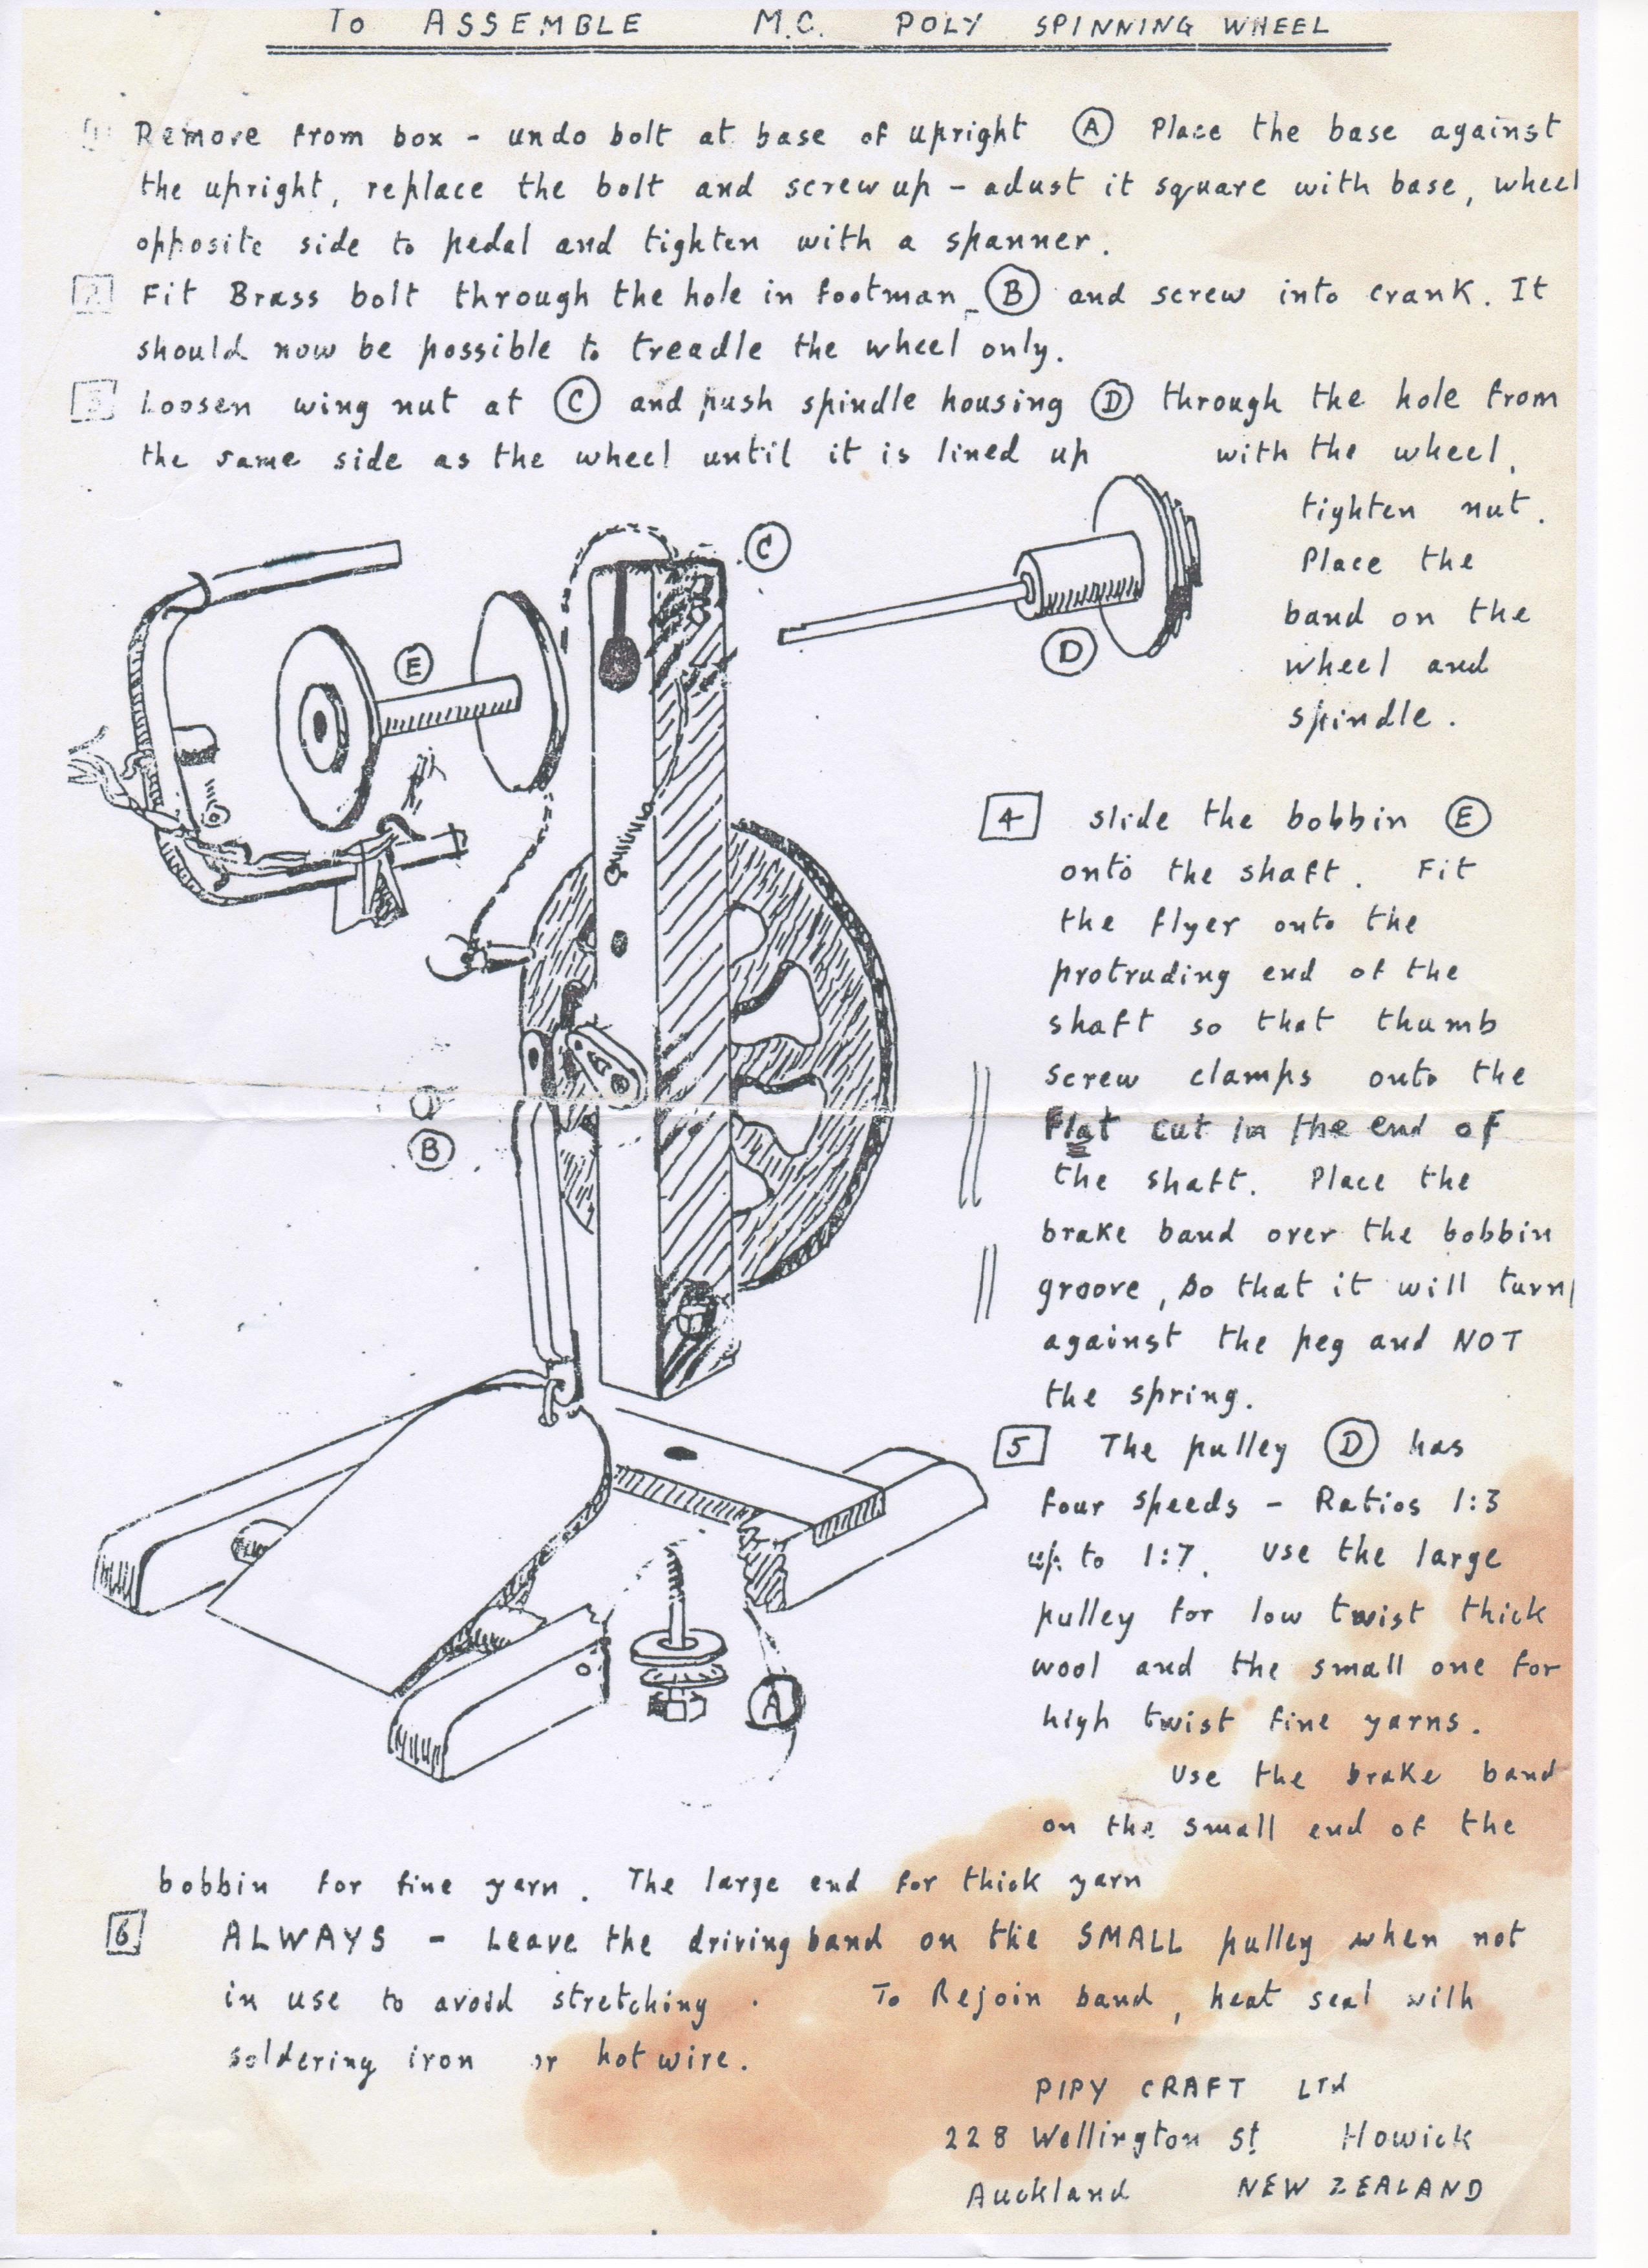
Earlier this year I attended two spinning workshops.  Though both workshops concentrated on spinning more unusual yarns, they had very different approaches.

The first workshop was on Creative Spinning run by Jane Deane, and organised through a local Guild of Spinners, Weavers and Dyers.  As well as a wheel and materials we were asked to take “a picture, found object, poem or something that really appeals” as a source of inspiration for the yarn.

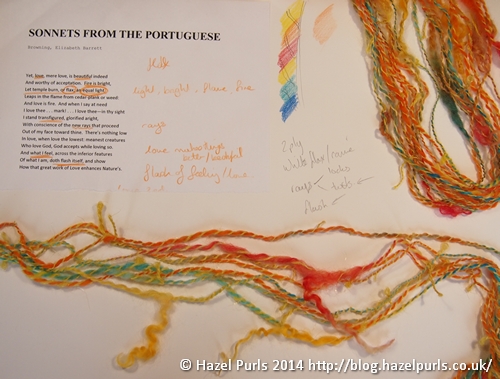
I wanted to work outside my comfort zone, so I took a poem.  I’d recently come across Elizabeth Barrett Browning’s “Sonnets from the Portuguese” so selected a couple I loved, eventually settling on the 10th:

Yet, love, mere love, is beautiful indeed
And worthy of acceptation.  Fire is bright,
Let temple burn, or flax; an equal light
Leaps in the flame from cedar-plank or weed:
And love is fire.  And when I say at need
I love thee . . . mark! . . . I love thee—in thy sight
I stand transfigured, glorified aright,
With conscience of the new rays that proceed
Out of my face toward thine.  There’s nothing low
In love, when love the lowest: meanest creatures
Who love God, God accepts while loving so.
And what I feel, across the inferior features
Of what I am, doth flash itself, and show
How that great work of Love enhances Nature’s.

I read through the poem, thinking about how this may be represented in the colours, materials and structure of the yarn.

annotated

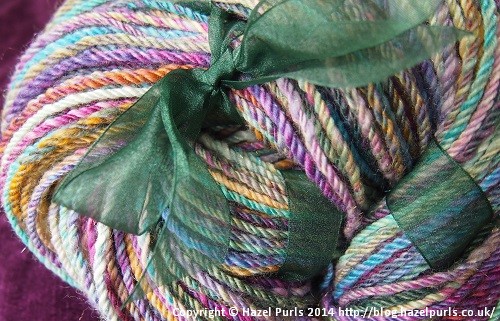
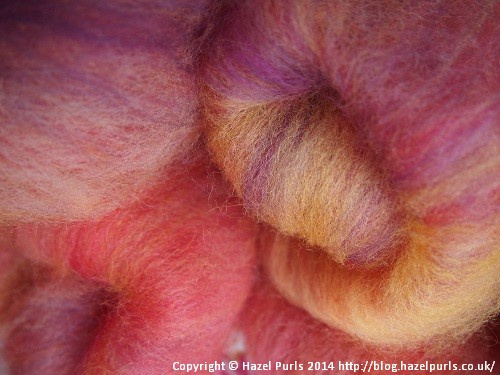
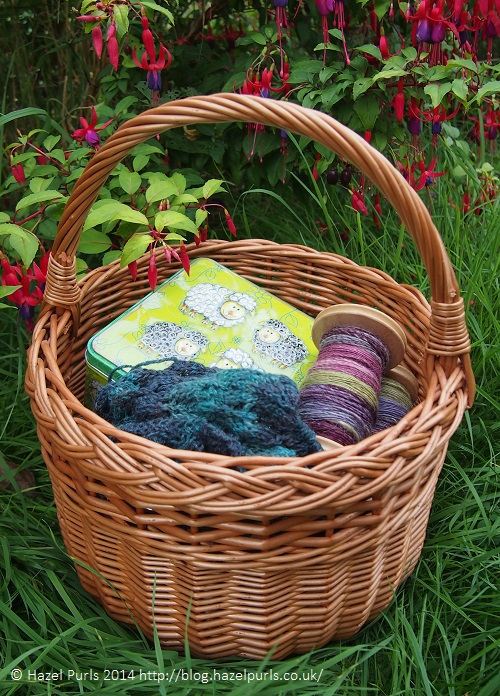
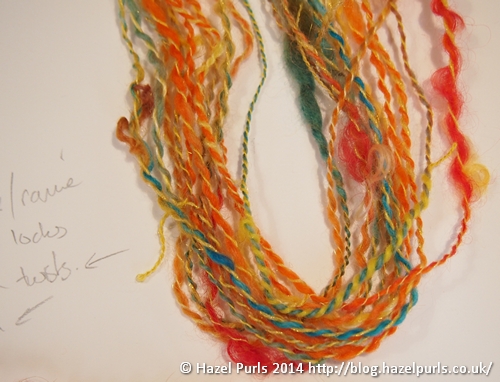
Then I worked through my materials to find things that matched the theme.  Dyed locks in yellows and reds (like flames).  Dyed BFL tops in yellows, oranges and blues (blue like the very hottest parts of a flame).  I didn’t have flax, but I did have ramie, which is also a bast fibre.  I used some gold nylon for the “flash”.  I spun two singles: one with the locks, tailspinning them into place; a second of BFL, ramie and gold nylon blended together and spun moderately finely.  I plied these, adding pigtails of the fine single occasionally (the blend made loops at the end of each twist – so I think this would be an interesting blend for bouclé yarn).

When I was finished I had an extremely exuberant yarn.

first

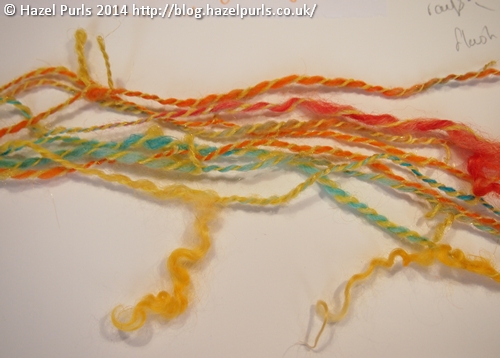
I spun a second sample, this time keeping the locks completely within the single and not having the tips hanging out of the yarn.

second

I thoroughly enjoyed this course, and could have carried on creating many variations on this theme (in the same way that composers produce many variations on a theme of an earlier composition).

together

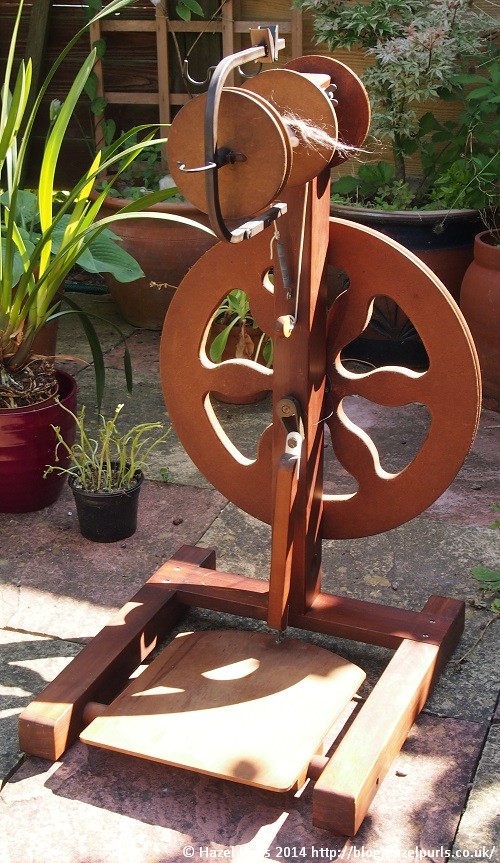
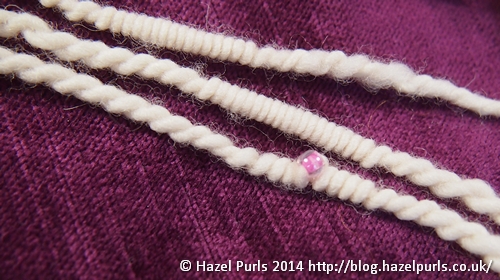
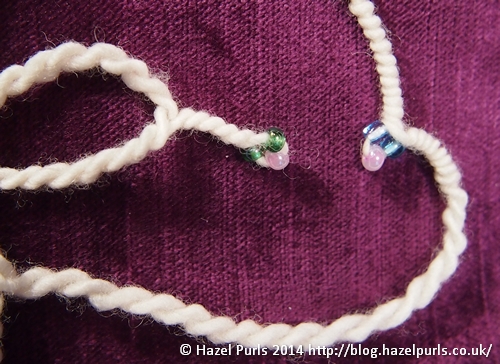
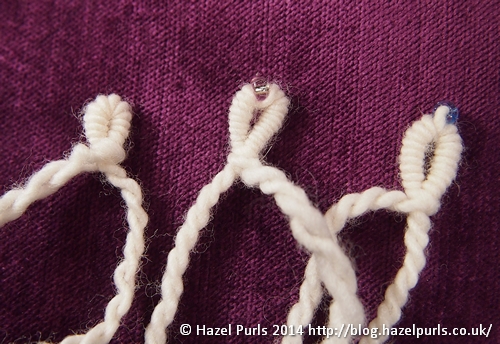
The second course was on “Coils””, Pigtails and Beads” and was run by Sarah Anderson and organised via Fibre East.  For this course we only needed to take a wheel as materials were supplied.

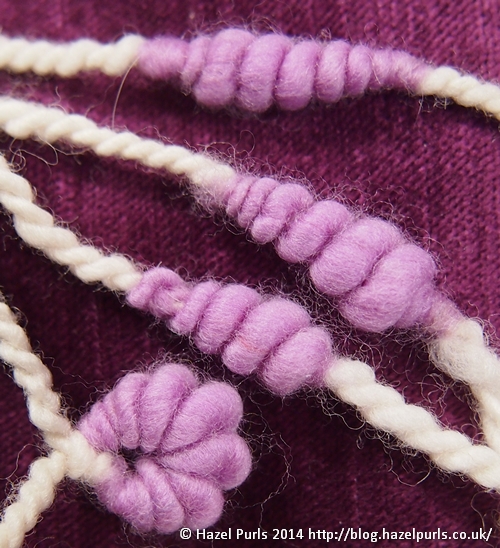
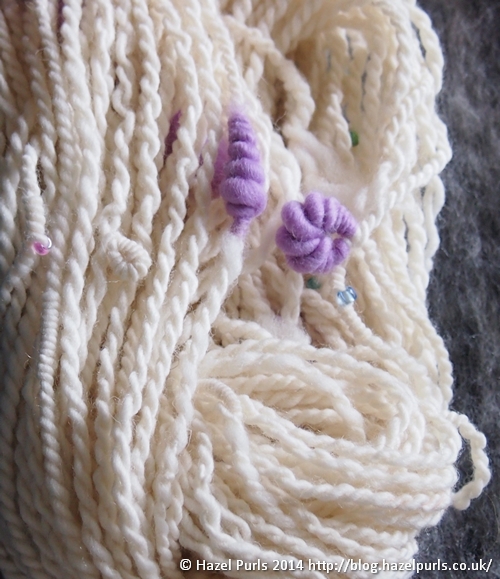
The course concentrated on plying, so we started by adding twist, lots of twist, into some commercial low-twist singles.  We then threaded beads onto both singles, ready for the fun to begin.

I found Sarah to be a brilliant and generous teacher.  She showed us the techniques, let us try them, showed us them again (and again as necessary) and helped us work through them until we were doing each to our satisfaction.  She gave lots of little tips and tricks along the way, and added some extra techniques towards the end of the workshop.  I came away with my head buzzing with ideas and a skein containing a wonderful array of techniques.

coils

picots

loops

beehives

yarn

Both courses were brilliant and inspiring in their own different ways.  I learnt so much in such a short space of time (much more quickly than I would have managed had I been at home working with a video or a book).  I would thoroughly recommend taking a course to help develop your skills.

Family Craft

Recently I opened up my portable spinning wheel and was surprised by my son’s reaction.  I was sure that he had seen me use it on many occasions, yet he expressed surprise that this funny looking object opened out into a full size, operational spinning wheel.

It made me wonder how often we carry out our hobbies and believe our children are learning a little by observing us, when we actually need to be more proactive in involving them in our activities.  I say this knowing that my son can knit and weave, is starting to crochet, has made felted pebbles and pictures, has spun yarn and has helped me with dyeing in the past!  Perhaps the solution is planned family craft times, when we can all work on projects together, rather than my craft being slotted into evenings and occasions when the children are occupied with toys or other activities?  Wouldn’t it be lovely if such times not only allowed the children to learn more about these crafts, but also enabled me to do more craft too! I shall plan a session and let you know what happens!

A tale of a wheel’s transformation

Long, long ago (last year); in a land far, far away (ok, about 10 miles away from here); I bought a spinning wheel.

original

It was a lovely wheel and I enjoyed using it to spin wild, unusual and time travelling yarns.

However, after a while I noticed a problem. The flyer was showing wear on the largest whorl and I started to worry that I would be damaging the wheel if I continued using it.  The wheel also had a wobble, which I hoped could be fixed.

wear

I took the wheel to bits (as far as it would allow) so I could refinish the drive-wheel and flyer surfaces (which are an MDF type of board – hard and dense made from glued together wood fibres) and give the spinning wheel a general overhaul and service.

TOOLS: I used a thingamabob (correct technical name, but just so we are talking about the same thingamabob, I’ve taken a photo).  I also used an hexagonal Allen key (imperial 3/32”), screwdrivers and an adjustable spanner.

thingamabob

To remove the drive-wheel, I took the crank off the drive-wheel’s hub shaft using the 3/32″ Allen key to undo the grub screws.  When reassembling there are two flattened surfaces on the shaft that the grub screws hold onto.

crank

In order to remove the flyer I used the thingamabob to grip gently onto the sealed bearing that runs through the wooden upright.  This gave me enough leverage to rotate the bearing in the wooden upright and wriggle it out (just pushing the flyer didn’t work as it is an extremely tight fit, the rotation allowed the flyer to be wriggled free).  When reassembling I again used the thingamabob, but also applied silicon lubricant in an effort to make it slightly easier, it was still a tight fit.

Once in pieces I gave the wooden parts of the wheel a good polish and made the base level (there is a slight warp in the wood for the bottom H of the frame, this was levelled by adding washers between two of the feet and the frame).

I then turned my attention to the MDF parts.  I decided to use the lazy kate to test any products I was intending to use on the wheel.  Though a good idea in principle, in practice it turned out that there had been more wear on the surfaces of the wheel than on those of the lazy kate.  So, if you have a Pipy Poly and wish to refinish the wheel, please check anything you use on a part of the wheel that isn’t going to matter if it reacts badly to the product.  In my case I discovered that using an acrylic based MDF sealer was a very bad idea – the surface of the drive wheel bubbled even though the lazy kate had been fine!!!!   Fortunately I didn’t damage anything that affects the performance of the wheel and the subsequent finishes hide the cosmetic damage.

Having discovered that MDF sealer was not suitable to use on my wheel, I looked for more information and discovered in a Jocasta Innes book that shellac could be used to seal old MDF furniture prior to painting.  I bought some “Button polish” (which is a solution of shellac in alcohol used in French polishing).  I put 2 or 3 coats of this on the MDF parts of the wheel (starting with the drive wheel and then working on the flyer and bobbin).

wheel-shellac

Next up was the painting!!!!

I used an acrylic spray paint to finish all the MDF surfaces (this was a fun task to do on the patio one day) I gave all parts 2 or 3 coats.  I finished with some silver paint and then a couple of coats of clear acrylic varnish.

wheel-paint

Sadly I was unable to fix the wobble, as the drive-wheel’s hub shaft has a small bend.  However, by carefully aligning the flyer whorls with the wheel, problems this was causing have been eliminated.  I’ve used pony bead lacing (used by children for making necklaces and bracelets) as the drive band material.  It’s softer than the poly drive bands but grips surprisingly well.  It is also extremely easy to cut and join, and comes in some great colours.  To reduce excessive wear on the flyer from using a tight drive-band I have three separate drive bands to use over the four whorls.

I put the wheel back together, just in time for us to attend a spinning course at the start of May!

wheel

flyer

I’ve been kindly given a copy of the instructions that go with this wheel by a friend.  Click on the image for a full-size copy:

instructions-thumb

I can’t remember what I had for breakfast

Yesterday I spent some time doing administration on a Ravelry group, work that I’d intended doing straight after the Tour de Fleece (TdF). As a consequence I think it’s about time I wrote up my TdF summary, although it’s a little bit of a challenge, as we’re now part way through October and that was in the early part of the summer.

My goal for this year’s TdF was simple, spin everyday and do some spindling while the Tour de France went past.  I did spin for 21 days, though took a rest day when I should have been spinning, and did a small amount of spinning on a rest day.

I spun on a spindle while waiting for the cyclists to whizz through our village.  The two lead riders shot past so quickly and were surrounded by so many support vehicles and motorbikes that I nearly missed them!  The rest of the cyclists were a couple of minutes behind and they passed through as a scarily compact fast moving pack.  It was all over in minutes and the rest of the day was delightfully quiet with the normally busy road being closed to traffic.  I’m embarrassed to say that anyone who has been reading this blog for a while will recognise the fibre on that spindle – I was trying to finish it for 2013’s TdF!

spindle

I spun a beautiful batt of carded merino in peacock colours, this was part of a secret santa gift organised via ravelry.  I spun it finely, but it wanted to be a little lumpy, so it is, and I love it. It was spun on the lace flyer of my oldest Ashford wheel, and plied from both ends of a centre pull ball (the first time I’ve tried this technique and it worked really well).

peacock

I finished spinning 200g of merino.  I spun the singles anticlockwise (S-wise) and Navaho plied them clockwise (Z-wise), with the intention that the yarn would be more suitable for crocheting.

nply

I plied some bouclé (the second half of this plying was was finished in August).  I’ve just realised that it hasn’t all been washed, I really should do that!

boucle

I carded up some lovely batts, which I will spin and felt into an art yarn.

batts

Finally, on the last weekend of the tour I took a lovely course at Fibre-East learning some great plying techniques, but more on that another day.

So, here’s the finished pile of TdF carding, spinning and plying.

tdf

A recipe

I’ve been continuing to work on sorting out my study and today I finally reached the point where I have a clear desk and can actually walk around the whole room!  This has to be the first time in nearly three years I’ve been able to do this, so quite an achievement (though I admit it doesn’t sound like much of one really).

I’ve just pulled a journal from my bookshelf which years ago I was using to record recipes.  There aren’t many recipes and most of them involve chocolate in some way.  I think my decision to use a journal that has a red velvet cover for recipes may explain why it isn’t very full.  The last recipe I’ve written in the book is copied from an issue of Woman’s Weekly, January 11th 1994.  I didn’t record the author and a search of the internet hasn’t revealed one, so I hope it’s ok to share it here and if anyone does know who the author is, please let me know as it would be lovely to credit it properly:

Recipe for Happiness

Take 12 months and scrub them clean of bitterness, greed, pedantry and fear.

Split each month into 28, 30 or 31 equal portions, so that the supply lasts for exactly a year.

Bring to each day, one part work and two parts each of cheerfulness and humour.

Add three heaped tablespoons of optimism, one teaspoon of tolerance, one grain of irony and a pinch of tact.

Then pour a liberal amount of love over the mixture.

Decorate the finished dish with plenty of compliments and serve daily with pleasantries, biscuits and a lovely cup of tea.

To Autumn

We’ve had a run of lovely summery weather, warm with soft mellow sunlight.  There’s been the odd day of rain, but otherwise the weather’s been the best that autumn can bring.  Keats’s poem of mists and mellow fruitfulness, late flowers for the bees and a maturing of the season expresses perfectly this year’s autumn.

heptacodium
Heptacodium miconioides in my front garden.  This has become quite a large shrub and is loved by the bees for its late flowers.

Autumn has brought the start of a new school year, and my youngest is now at school too!  I’ve been working on getting my study/workroom organised, as it has become the room things get dumped in.  Earlier this week, after doing some work on it, I explained to one of my children that getting something from the room could take a while, as it was now “upside down, inside out and backwards”!  It’s a work-in-progress, but at least it now has lovely curtains (with thanks to my mum for giving them to me) and the orchids look pretty on the windowsill.

orchid

I’ve been on tenterhooks all through this week, hoping the good weather would hold – because I was due to spin in a field today!

dahlia
Huge dahlias in a local garden

Fortunately the day was the best it could be.  Pleasantly warm with just a hint of a breeze, though I think it’s best that the hog roast isn’t mentioned.

medlar
Medlars in the same local garden

I took a hand-dyed top of blended alpaca and blue face Leicester to spin.  I get very cold hands in the winter, so I hope the alpaca will make for very warm gloves.

bobbins
Two bobbins in the sun

I haven’t decided how to ply these yet.  Whether to ply with a plain single, to Navaho ply, or to ply together.  I shall let the bobbins rest awhile until I make a decision (but not too long, gloves for winter would be very nice!)

I’d overestimated how long it would take me to do the spinning.  After just an hour I found I’d already spun the first 50g! However, with breaks for tea and sandwiches, plus a few rows of knitting on my shawl, I was able to eke out the second half of the spinning for the whole afternoon.

basket
My spinning basket in the garden with the results of today’s spinning and knitting

It was a lovely way to spend a day.  Spinning outside on a warm, sunny day, in the company of friends, with interested visitors, of all ages, asking us questions and sometimes having a go themselves.

Playing with Colour

The last few evenings I’ve been playing with colour, but there’s been no wool or vinegar, I’ve been playing with watercolour.  It’s been years since I last did any watercolour, so long ago I can’t remember when.

I’ve noticed lately that good painting supplies have become exceptionally expensive (even student quality paints like Cotman) so I’m pleased that I appear to have bought good brushes and paints in the past. I even have a good selection of paper and a board for stretching paper before painting on it.

paintings

Exploring the paints and some different painting styles.  I need lots of practice!

Over the last few days I’ve learnt a few things.  Firstly, it’s possible to soak the paper for too long (even really thick paper) prior to stretching.  Leaving it soaking too long will remove the size on the surface of the paper.  Then, when you try and paint on it, the paint will soak in immediately and not allow any kind of movement of the paint on the paper.  (I’ve only tried to stretch one sheet of paper so far… unsuccessfully)

Secondly, various places (on the internet) have said that watercolour paper is sized with gelatine.  I’ve not been able to check this with the manufacturers of the paper, but (as a vegetarian) that does lead to some ethical issues for me. For the moment I shall use the paper I have and hope I can either disprove this information, or find a suitable source of watercolour paper that doesn’t use a gelatine size.

Next, I was struck by the small size of stuff I need to paint.

paints

Yes, that’s it!  A box of paints, a small pad, a couple of brushes, a pencil and a rubber (and probably also a sharpener and something for water).  Compared to what I need for spinning it’s a delightfully small pile!

Finally, I’ve discovered the appeal of making small paintings.  I’ve had that postcard pad for years, and couldn’t see the point.  I’ve always thought of painting as needing to be A4 or A3 sized as a minimum.  But I’ve found it delightful to make a small painting: it’s possible to quickly explore a technique or idea without committing to something larger and you end up with something finished in a short time.

I’m looking forward to seeing where my painting takes me and how the painting may feed into my spinning.

It’s been a while!

runs a finger through the dust on the blog heading

Sorry about that!

fetches a feather duster and twirls it in the corners… sneezes!

Since we last spoke there’s been the Tour de France (and the much more interesting Tour de Fleece), I’ve attended two spinning workshops and been spinning, knitting, weaving, attempting to prevent the garden turning into a very wild place, running a code club and generally trying to keep up with two young children…

watches as some fluff bunnies bounce, like tumbleweed, across the bottom of the blog

I hope to catch up on some of that in future blog posts, in the meantime I’d like to show you what I’m currently working on.

shawl

It’s my first lace shawl, and I’m knitting it with my own handspun yarn.  Now, I have to admit that I couldn’t remember what fibre this was, but looking back at my blog, it appears to be some Blue Faced Leicester I dyed and spun on my Ashford wheel.  I’d been knitting for a few days when I realised that I’d Navaho plied it (I was wondering why the colours had remained separate)!

The pattern is True Romance Shawl by Juju Vail which was in Mollie Makes a few months ago.

shawl-edge

I’ve really enjoyed knitting it so far.  I got a huge buzz of satisfaction from fixing a mistake, two rows after I made it, without needing to tink back.  I’d skipped a yarn-over then added one at random a few stitches later.  I’d also made the yarn-over on the wrong side of my marker for the centre stitch (which added to the confusion and may have contributed to the mistake in the first place).  Anyway, with the aid of a crochet hook I created a new yarn-over and dropped the extra one, and after a couple of rows the mistake was invisible!  The lace is lovely and simple to work, but defies the placing of markers to make counting easier.

lace-close

jumps as a HUGE spider runs across the blog

Wow, that really was a big spider!  Did you see it?  I should probably go and get a glass and some cardboard and pop it outside, but I think I’ll leave it as a guard spider to scare the hackers who are constantly trying to discover my password.  Good luck to them I say! Most of the time I can’t remember it myself!

Anyway, Harriette my assistant is delighted I’m writing this blog post and is encouraging me to finish the shawl quickly so she can model it before it gets too cold and wet for a photoshoot in the garden!

So, TTFN until next time (and I promise I’ll try and come back much sooner).

Having a Play

The sun has been shining, nearly all week! It’s warm and the garden is growing away! I recently bought some pots for the patio, planted up with lovely spring flowers:

Viola

Today I spent a whole £1 on my new fibre tool.  A door stop (actually there were two in the pack).

I’ve been seeing rolags everywhere, and I’ve decided it’s about time I had a play!  I don’t have a blending board, but in theory I should be able to do something similar on my drum carder. So I’m going to get my coloured wool out, some sparkle, find some wooden knitting needles and have a little play with my drum carder to see what I can do.

What do I need the door stops for?  Theoretically they are pushed down the side of the main drum to hold it still while I’m making the rolags, but if they don’t work then I’ve got a couple of useful door stops!